Sunday, February 24, 2019

How My Evergreen Facebook Campaign Works

How do you keep a campaign fresh? You make sure that the audience it reaches is perpetually fresh. You can do this with an evergreen Facebook campaign.

I’ve been using this approach since 2015. It still works today.

An evergreen Facebook campaign can utilize one ad or dozens of ads. It can be shown to each user for a handful of days or several weeks. It can be as simple as a single track or it can send people down different tracks depending on how they interact with it.

The possibilities are endless. But I wanted to give you an example of what I’m currently doing.

First, a little refresher…

What Are Evergreen Facebook Campaigns?

Your campaign works great for a few days. Sometimes a few weeks or even months. But then, inevitably, it hits a wall. Why?

In most cases, this can be attributed to ad fatigue. You ultimately start showing the ads — even if you change creative — to the same group of people. You exhaust those who are most likely to act.

Evergreen Facebook campaigns are effective because, while they might run for months at a time, you can limit how long each user is shown ads within it. And you can show a series of ads in sequence, like a drip campaign, to convey a message.

How does this work?

1. TRIGGER ACTION: A trigger action is an action that a user will only perform once. Typically, this may be a registration or even a low-level purchase. Ideally, it’s an action that has some volume, and you have the goal of some greater action later.

It’s important that a user performs this action only once and can’t do so again. Why? Because every time they perform that action, they go through the evergreen Facebook campaign again.

That’s what makes registrations and small one-time purchases ideal. They are easier to control. While you can use reading a blog post or watching a video as the trigger action, you need to get creative to make sure that if they read or watch again, they don’t restart the process.

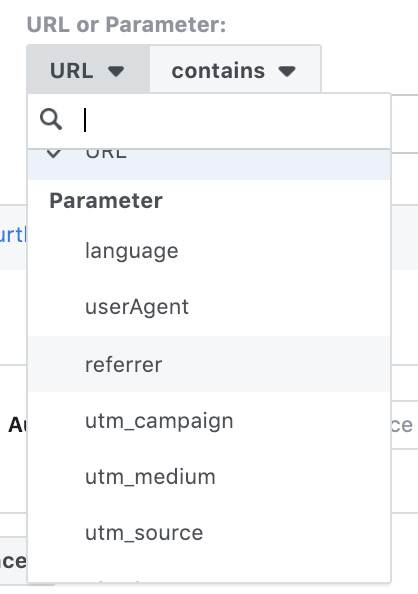
2. DURATIONS: Evergreen Facebook campaigns work because of Custom Audience durations. What is this? It’s the length of time someone remains within your audience after performing a particular action.

For example…

Custom Audience Duration

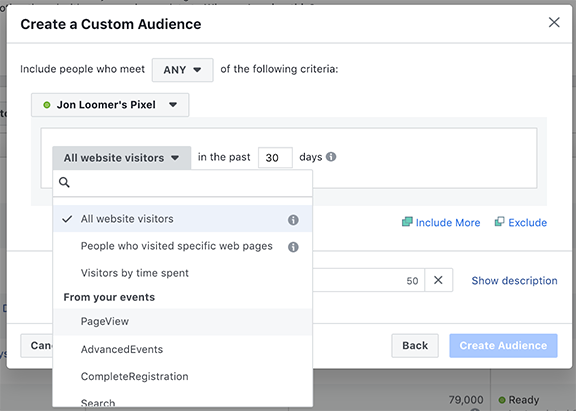
In the hypothetical example above, you are creating an audience of all people who hit the thank you page following registering for a webinar during the past four days. That is a rolling four-day window. Someone can’t register for it twice (good trigger!).

So here, you can imagine creating an ad set that targets this audience — all people who registered for your webinar during the past four days — with a particular ad. Since this audience updates dynamically, people will only see the ad for up to four days, and a new audience will constantly see it as new people register.

3. EXCLUSIONS: Exclusions are one of the most important and under-utilized strategies in Facebook advertising. They are critical to the effectiveness of evergreen Facebook campaigns.

First, you can exclude people who already performed the action you are promoting in the ad. Whether it’s reading a blog post, watching a video, or buying a product, there’s no need to show people the ad after they perform that action.

Second, exclusions allow you to create a series of ads in sequence. For example, what if you wanted to show two ads in sequence, each for four days, following the registration for your webinar?

You’d do this…

  • Ad #1: Target webinar registrations – 4 days
  • Ad #2: Target webinar registrations – 8 days (exclude webinar registrations – 4 days)

You don’t have to stop at two ads. You could go on and on and on, showing a specific ad to people at specific points in their journey through the campaign.

For more on this, check out a couple of blog posts I’ve written:

My Evergreen Facebook Campaign: Trigger

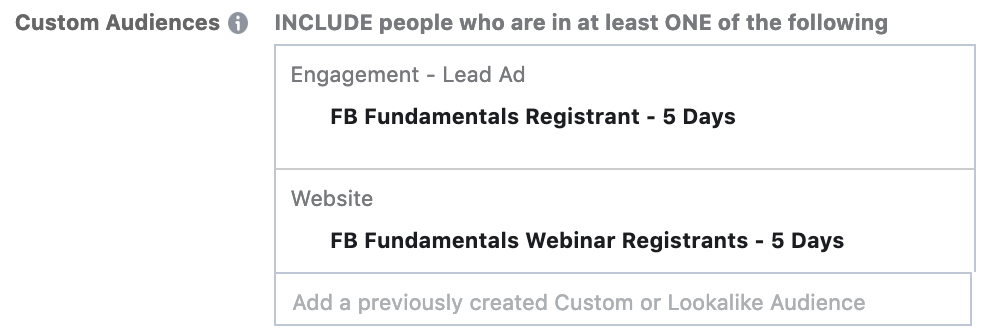
The trigger action that I use for my current evergreen Facebook campaign is registration for my free webinar. There are two ways that I can target these people.

People registered both on my website and via Facebook lead ad forms. As a result, I could target registrants via a Website Custom Audience of the thank you page following registration on my website as well as the engagement audience of those who registered via the lead ad form.

Evergreen Facebook Campaign Targeting

Note that I’m also running a similar evergreen Facebook campaign for people who participated in a quiz that I’m doing. That one functions almost the same way, so I’ll focus on the webinar example here.

My Evergreen Campaign: Durations

As you can see in the image above, I decided on durations in multiple of five for this campaign. No real reason. I actually went with four for the other campaign that targets quiz participants.

That means I can show people a new ad every five days. My campaign can run beyond 40 days for some people (showing eight very different ads).

My Evergreen Campaign: Ad #1

I like to start with an About Me post, telling the new registrant more about me and my business.

Evergreen Campaign Ad 1

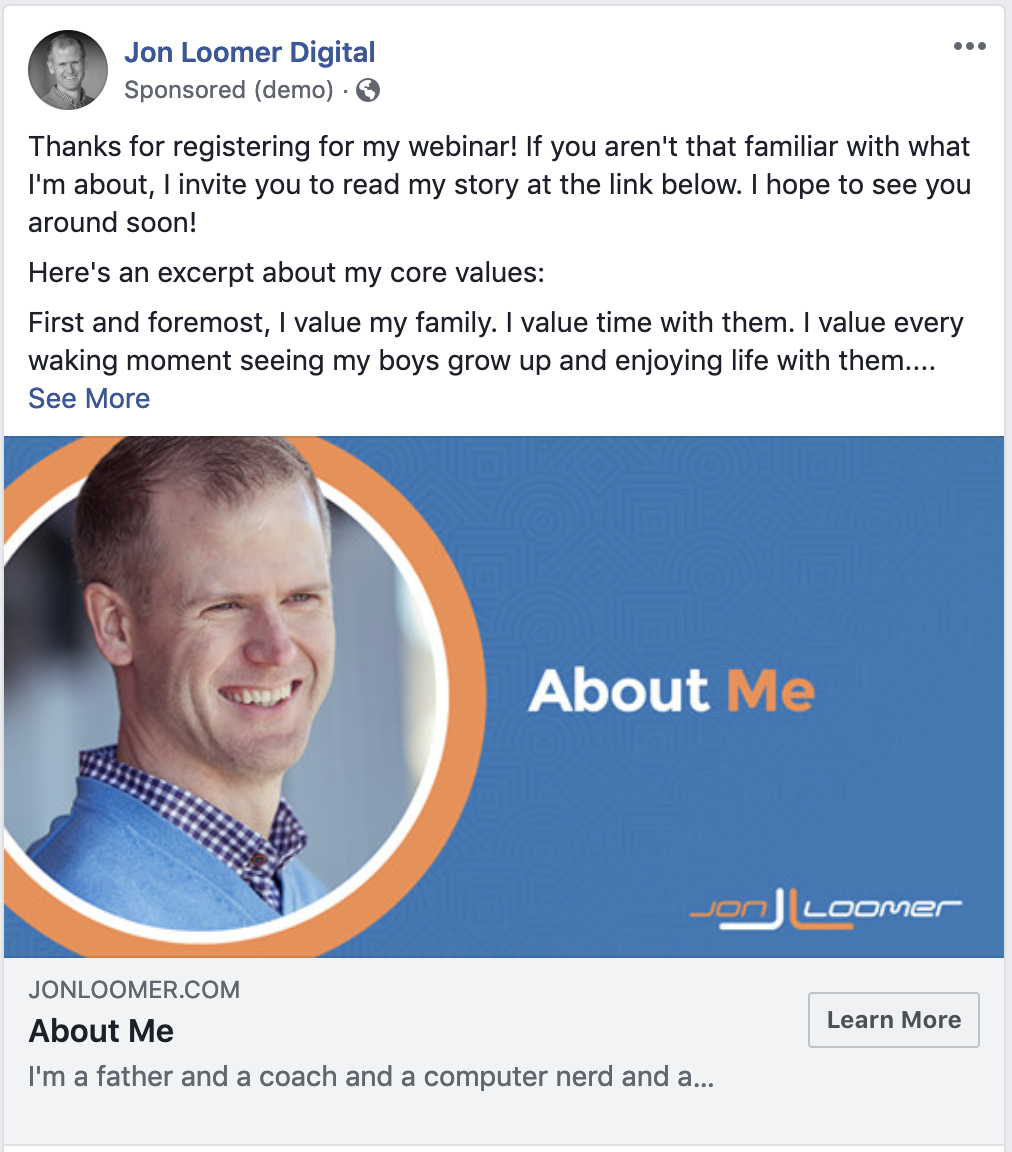
Note that I’m not selling anything here. I’m taking a long-tail, soft sell approach. You don’t need to.

If you wanted, you could go straight to the sale. Promote something related to the trigger action.

My Evergreen Campaign: Ad #2

During days 6-10, I show registrants an ad that includes a survey.

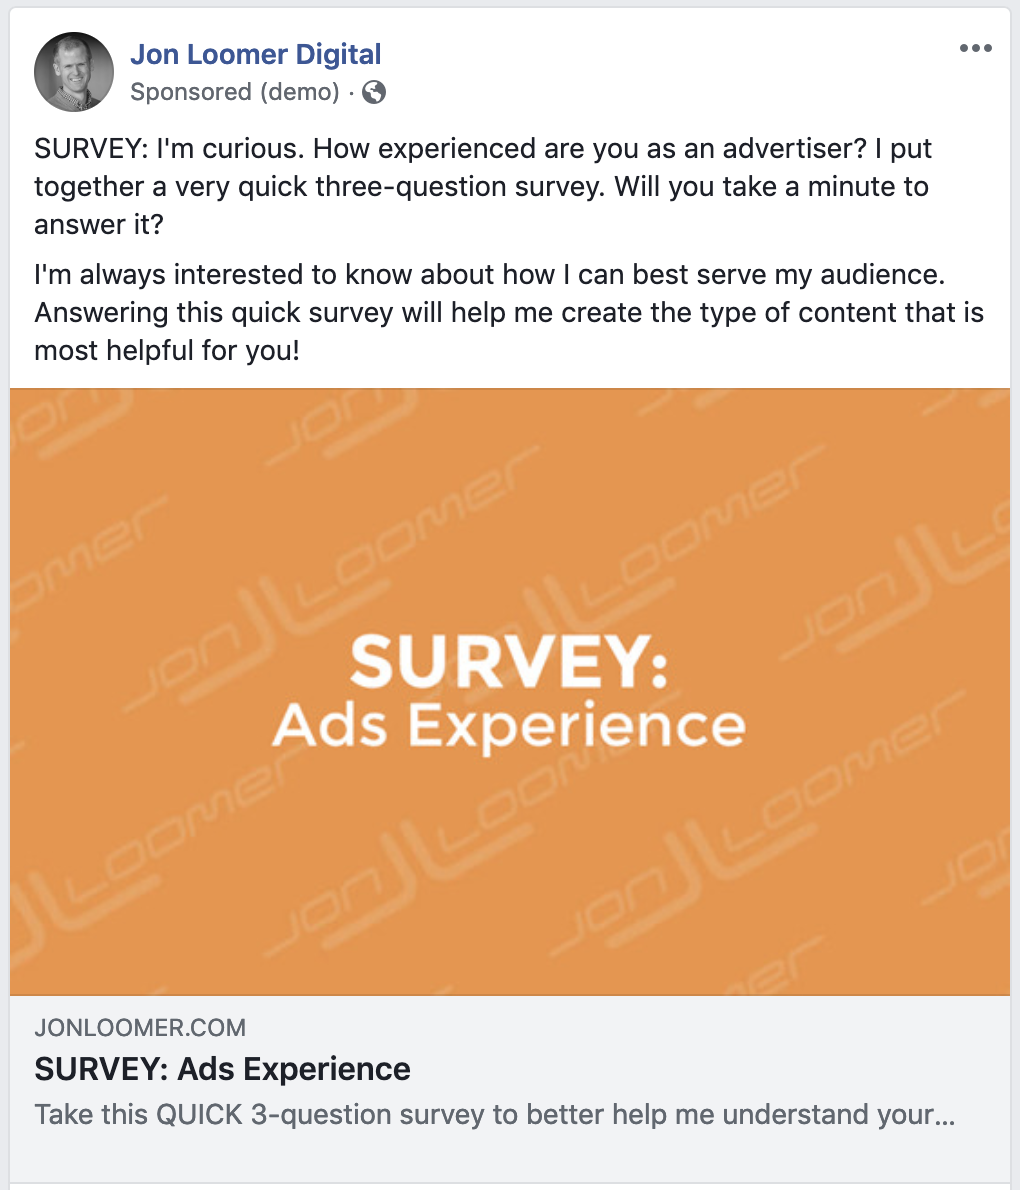
This survey occurs on my website and asks questions about your experience and comfort level with Facebook ads.

Facebook Ads Experience Survey

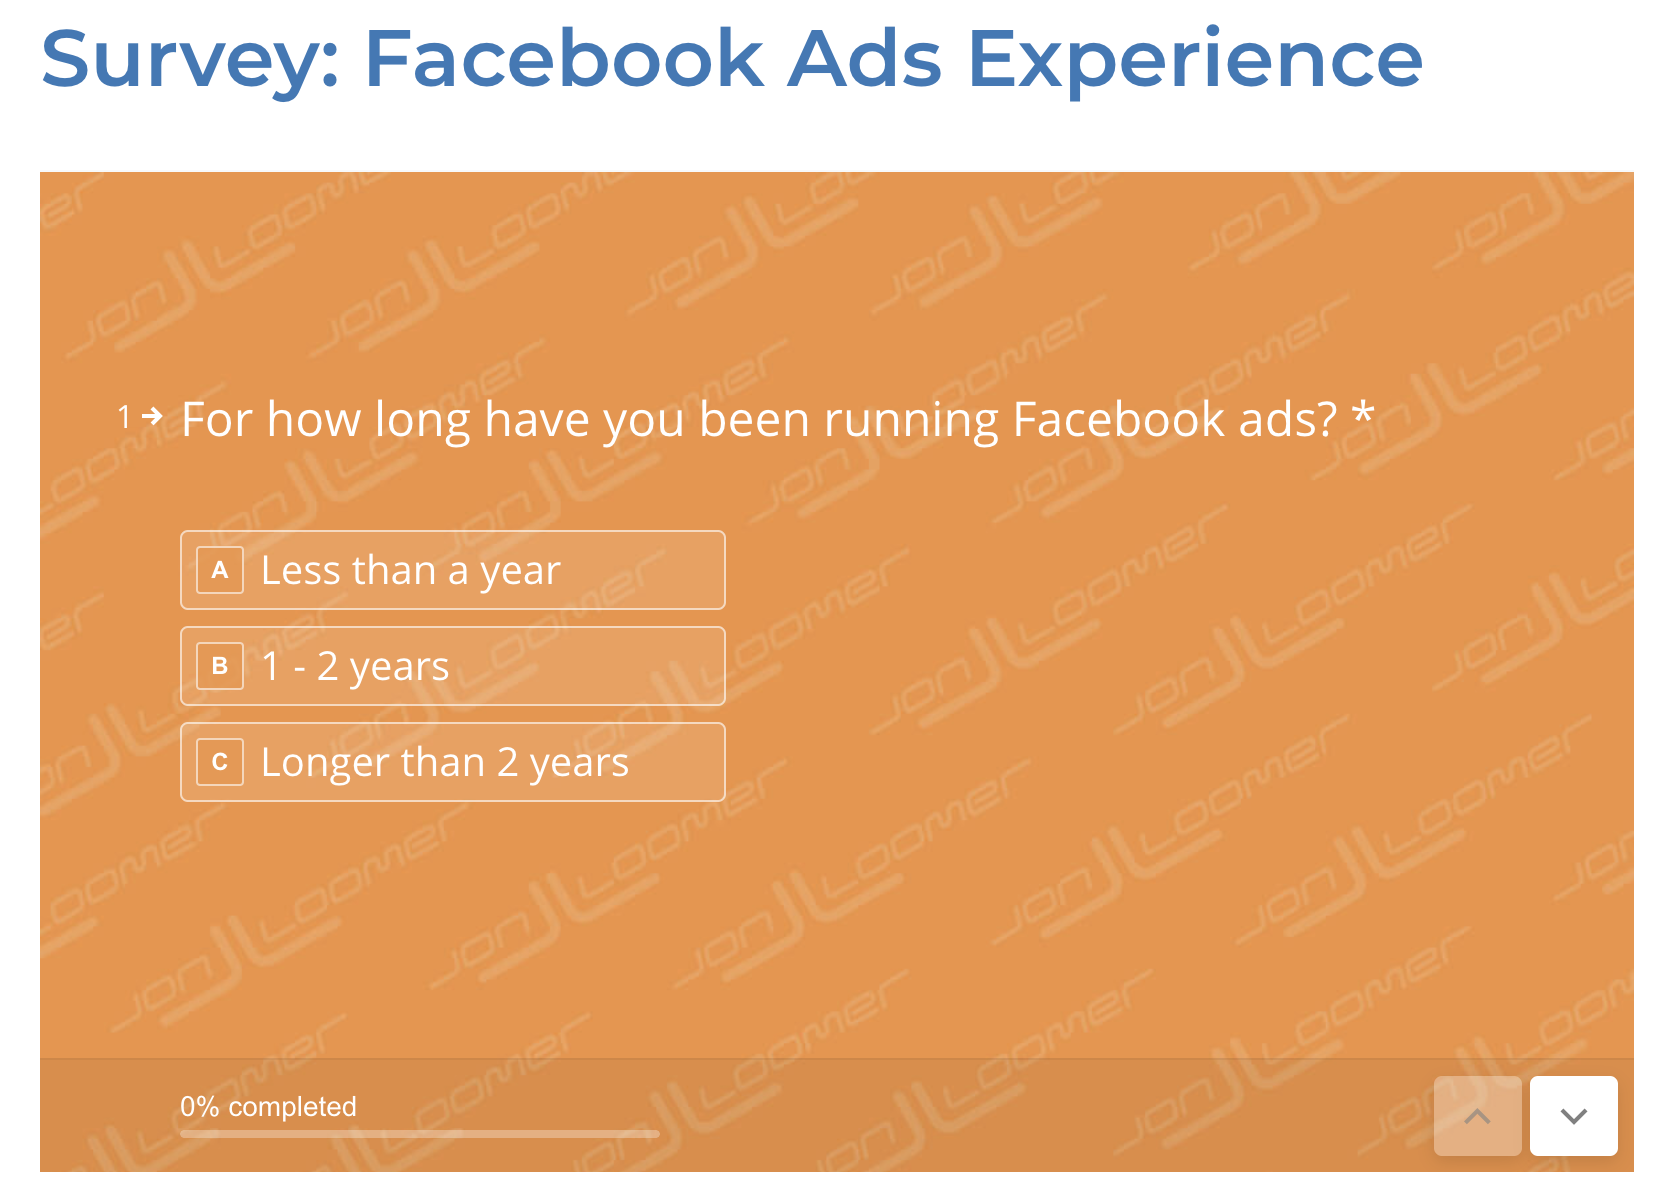
This is useful information generally, but I also use this for targeting later. You see, I’m able to create audiences of people based on their answers.

[How I do this is a bit more complicated, and I’ll be covering it during my upcoming training to help you create your own evergreen campaigns.]

My Evergreen Campaign: Ad #3

My next ad, during days 11-15, features another survey. This time, I want to know more about your business.

Facebook Ads Business Survey

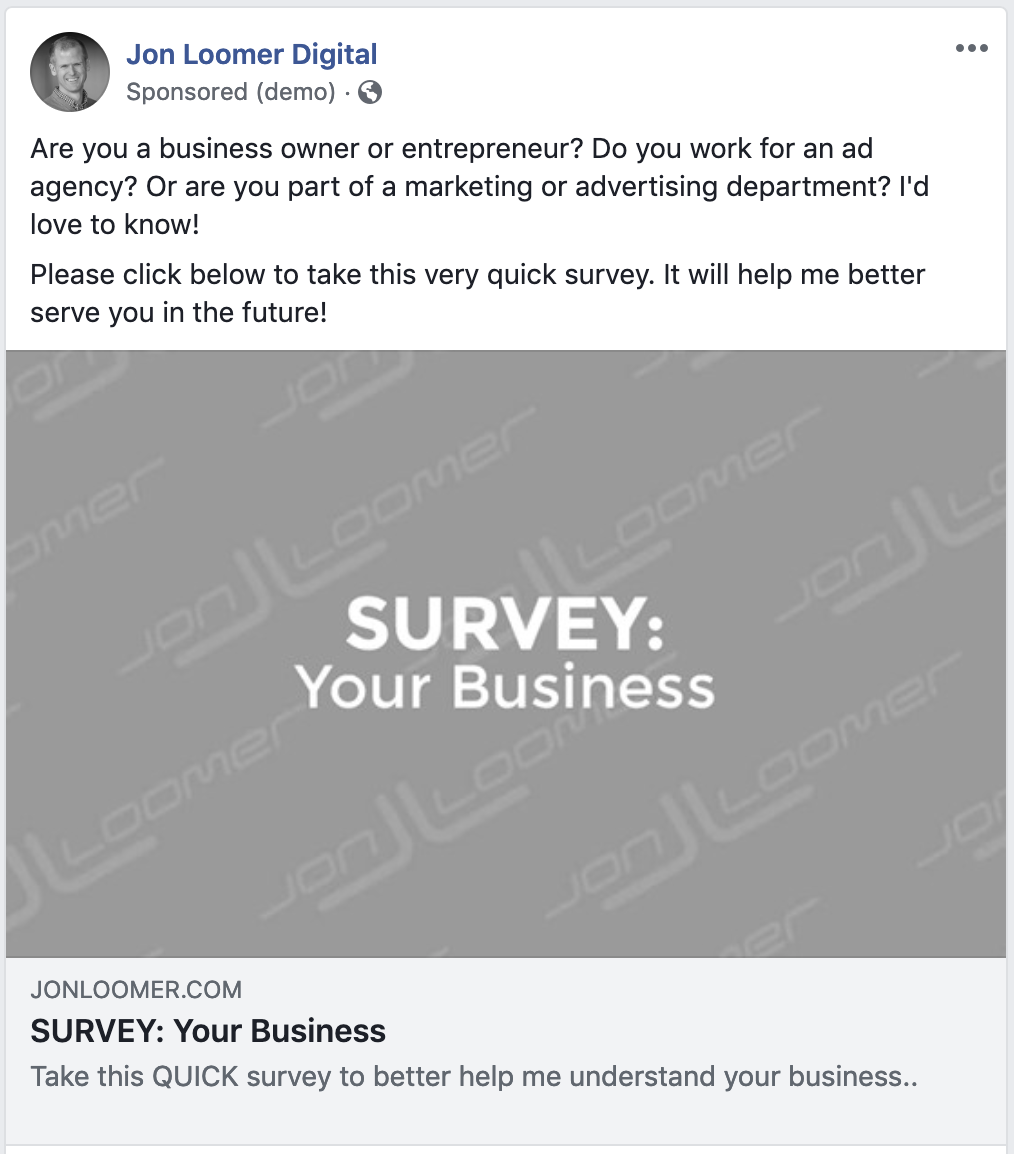
I want to uncover who is a business owner or entrepreneur. I’ll be able to target those people later in this campaign (and in other, separate campaigns).

My Evergreen Campaign: Ad #4

Next, I showcase a quiz during days 16-20 of the campaign. This quiz tests you on your knowledge of Facebook ads.

Facebook Ads Quiz

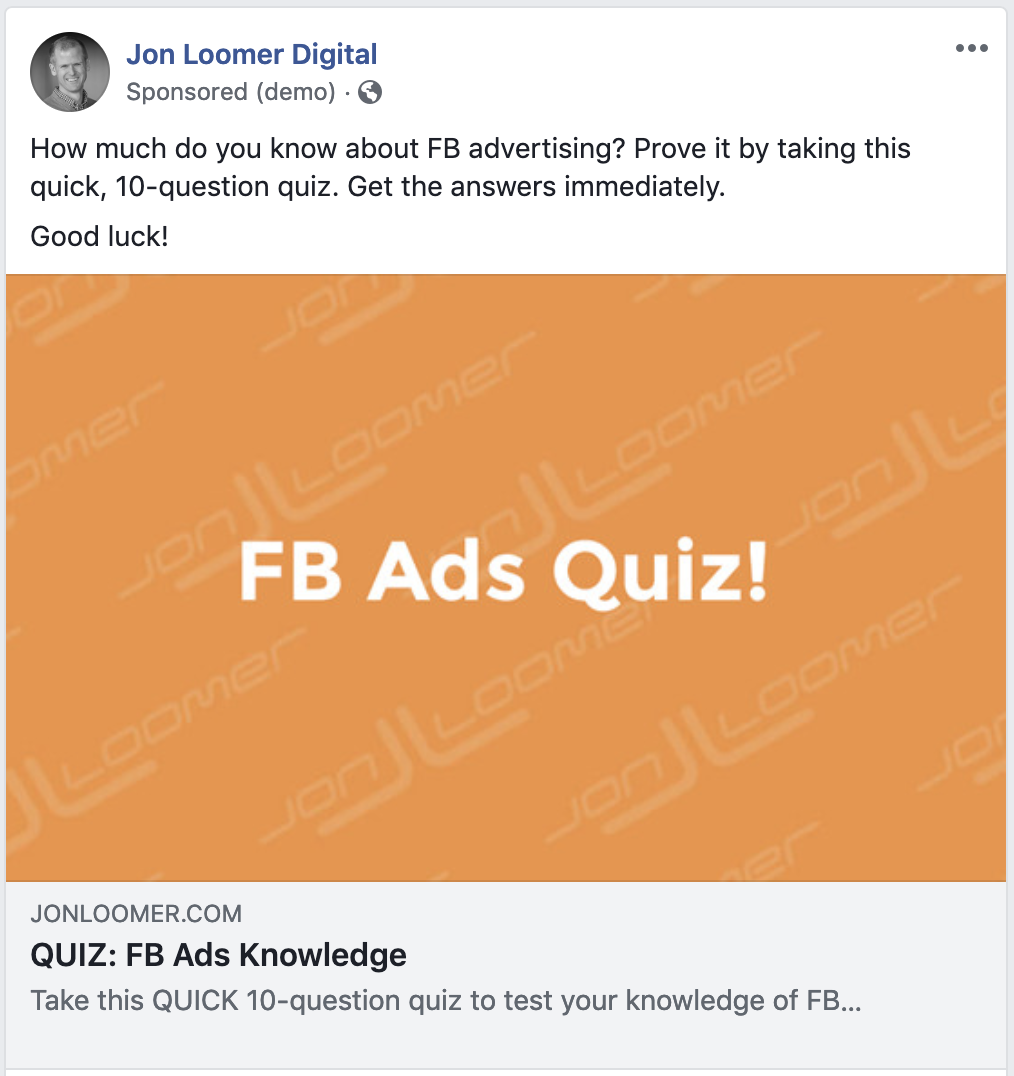
Similar to the survey, I can use this information for later targeting.

My Evergreen Campaign: Ad #5

During days 21-25, I utilize a carousel to showcase three blog posts I’ve written about evergreen Facebook campaigns.

Facebook ad carousel

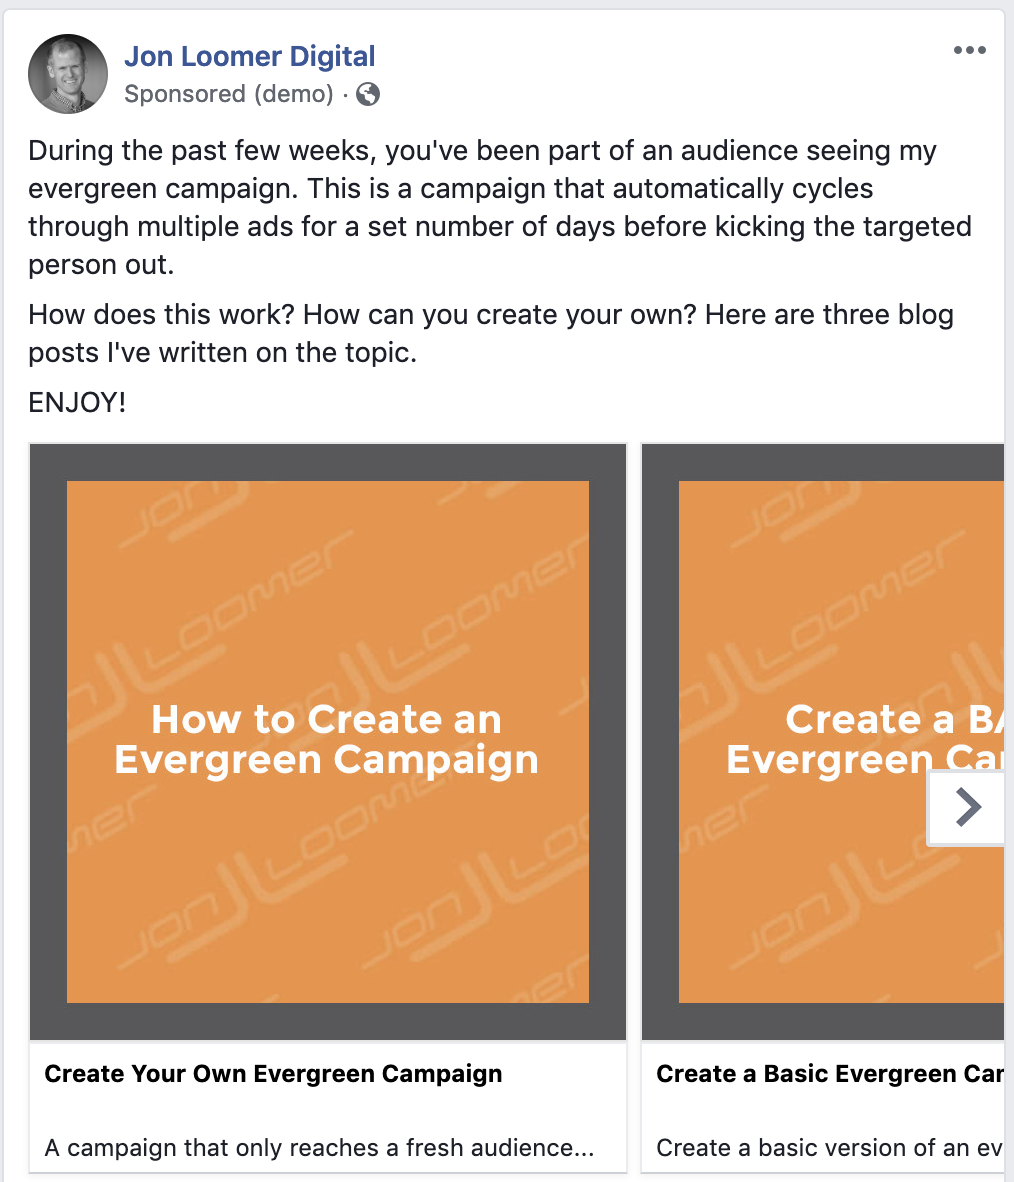
The hope is to get you interested in this approach.

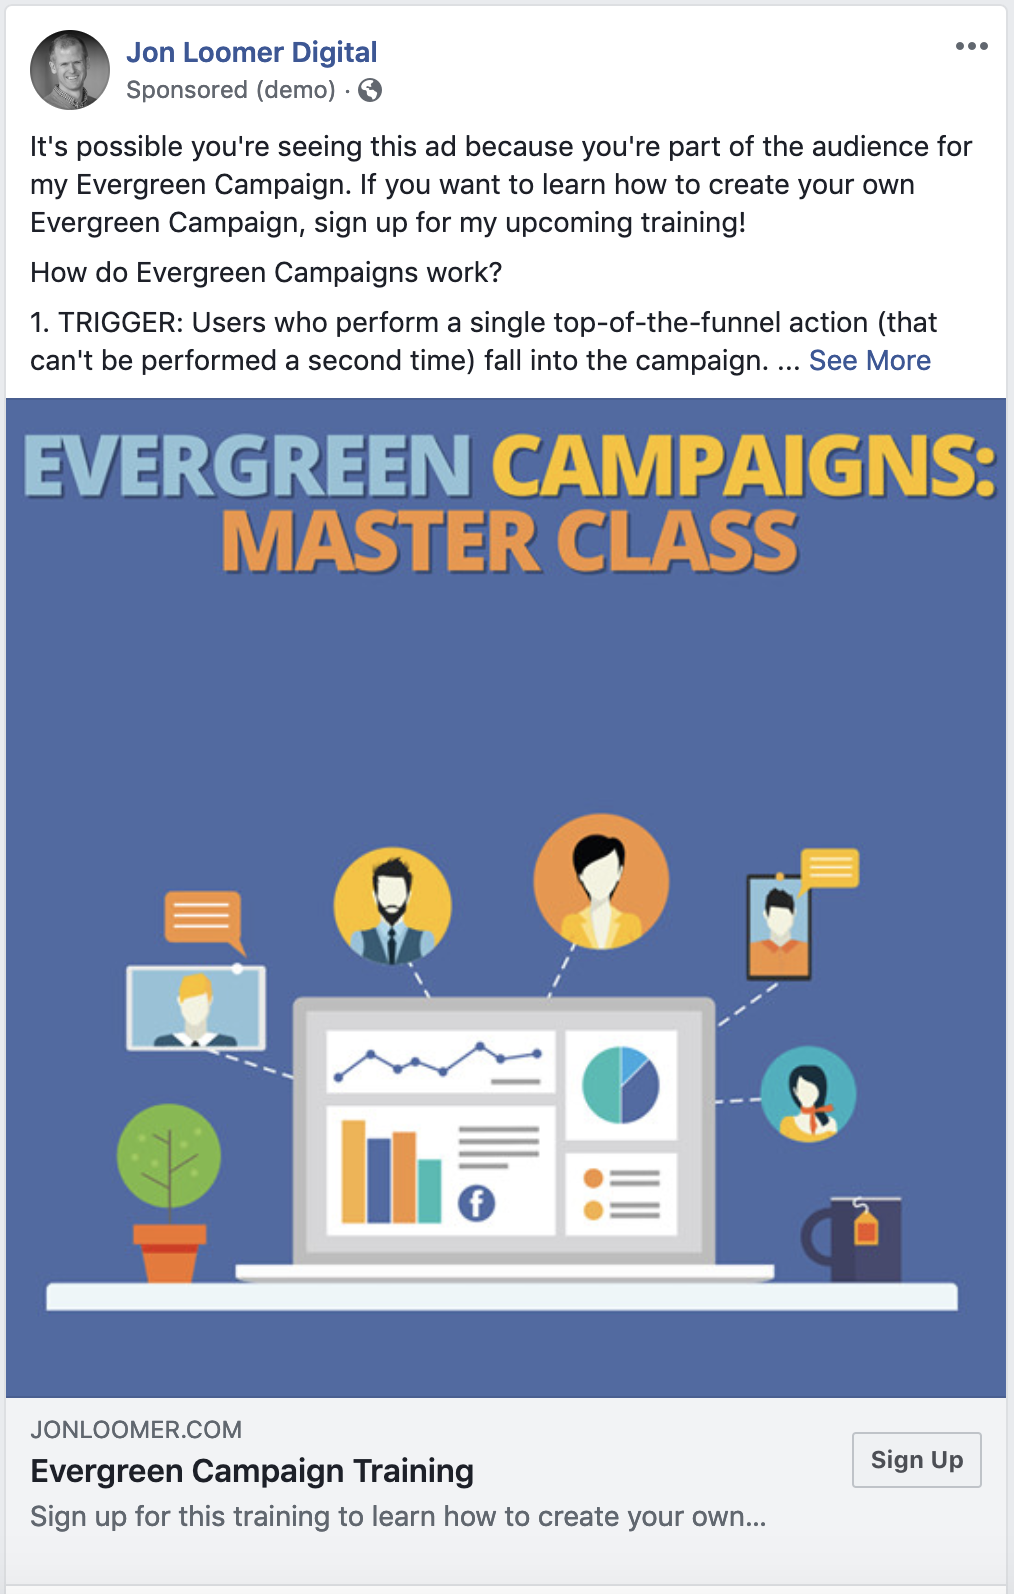
My Evergreen Campaign: Ad #6

During days 26-30, I promote my upcoming Evergreen Campaigns Master Class.

Facebook Ad

I will exclude the following groups:

  • Already signed up for training
  • PHC – Elite member (already get access to training)
  • Indicated they are a beginner advertiser in survey
  • Faired poorly on quiz

Since creating evergreen Facebook campaigns is a more advanced strategy, I don’t want to show this ad to new advertisers who are just getting started. It is bound to be over their head.

My Evergreen Campaign: Ad #7

I will promote my PHC – Elite private community during days 36-40. This is also the ad that will run in place of promoting the training after the training is complete (since members can get access to the recordings).

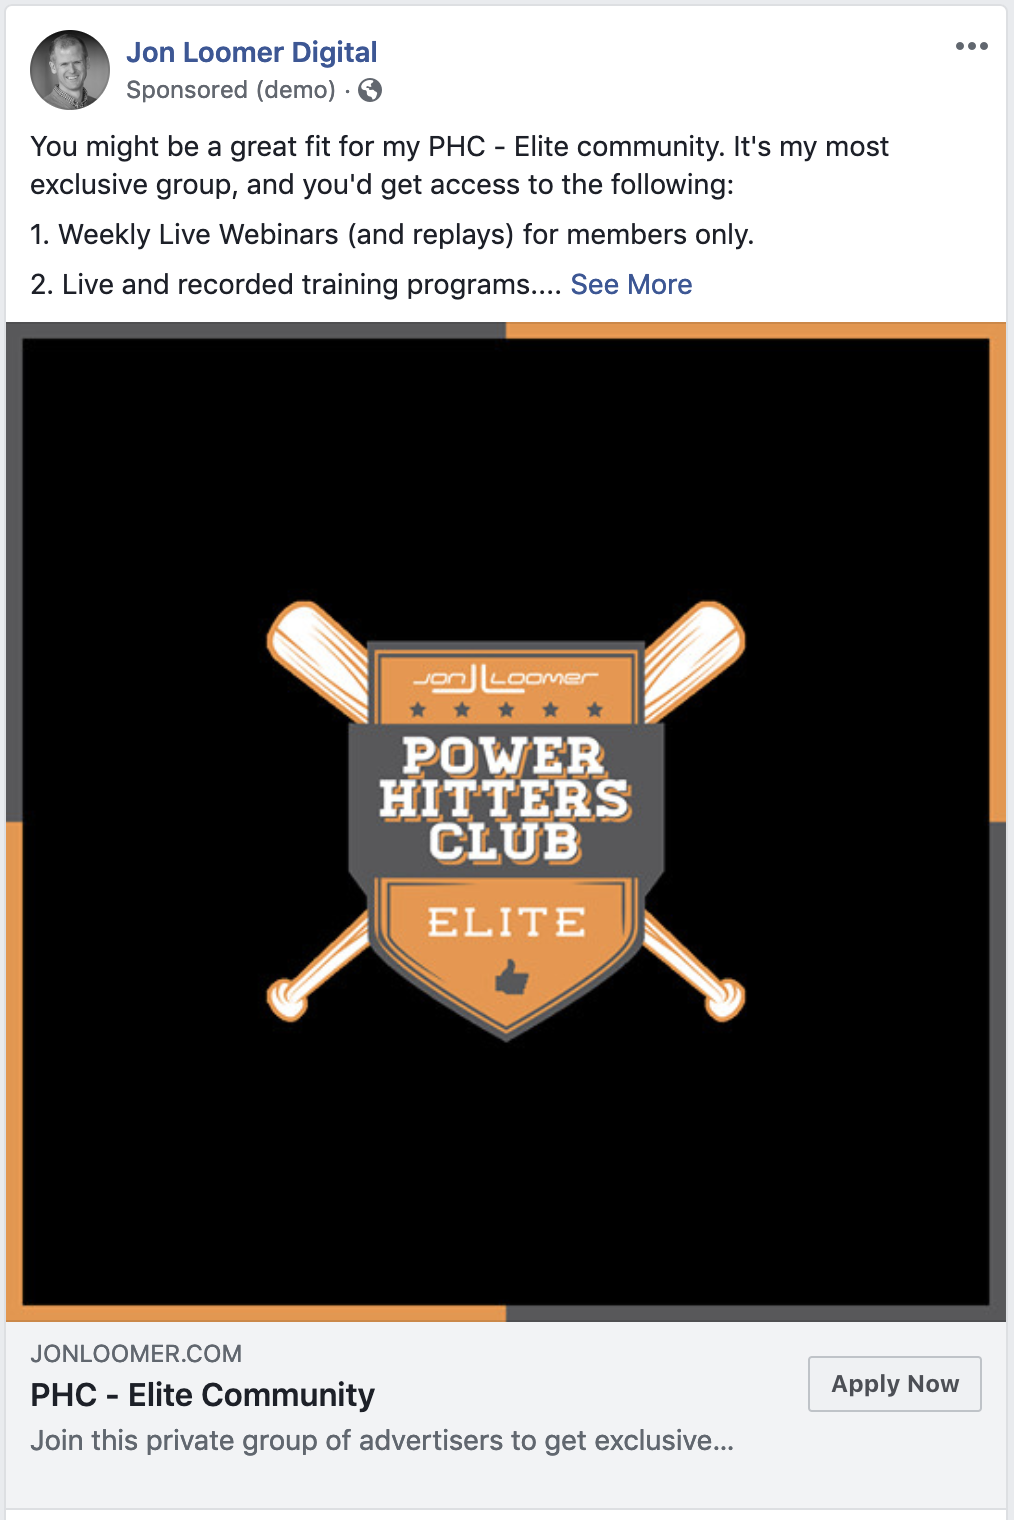
Once again, we’ll exclude beginner advertisers and current PHC – Elite members from this audience.

My Evergreen Campaign: Entrepreneur Track

From there, the “base” evergreen Facebook campaign is complete. If you don’t sign up for the training or PHC – Elite after those first 40 days, you’ll stop seeing the ads in this campaign.

With one exception…

If you indicated in the business survey that you are a business owner or entrepreneur, you will now fall into the entrepreneur track of my evergreen Facebook campaign. That includes ads for blog posts focused on entrepreneurship…

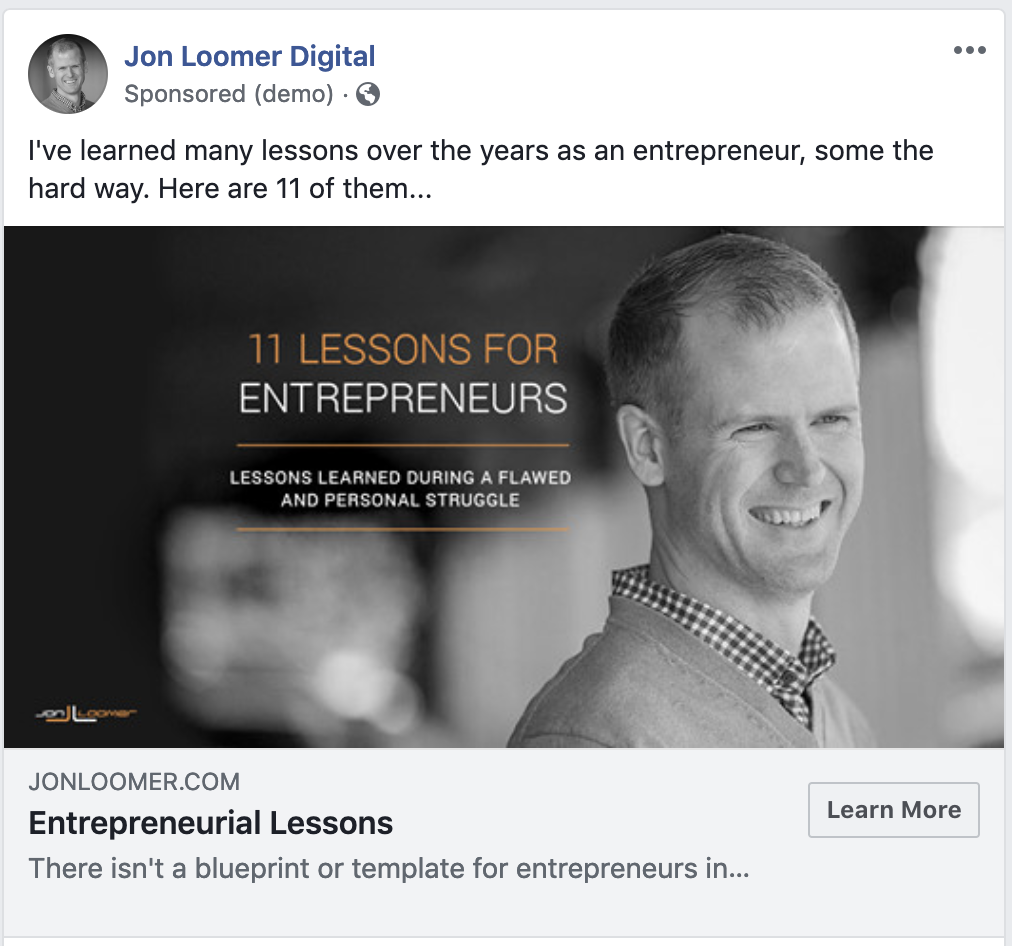
This thing can keep going and going, depending on what you want to do!

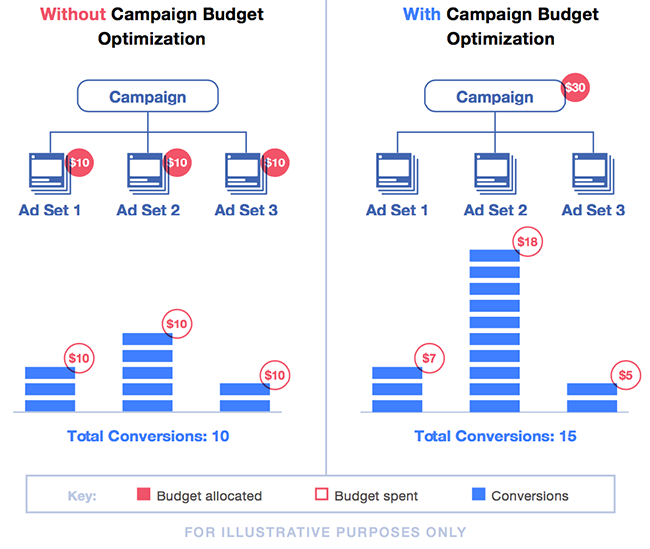
My Evergreen Campaign: Optimization

Know that you have lots of options for optimization. There isn’t a clear right way to do this. Ultimately, two main questions should determine how you want to handle it…

1. Do you have lots of volume of trigger actions?
2. How important is it that you reach everyone who performs the trigger action?

If you have plenty of volume or don’t feel the need to reach everyone, you can optimize for a specific action, like a purchase.

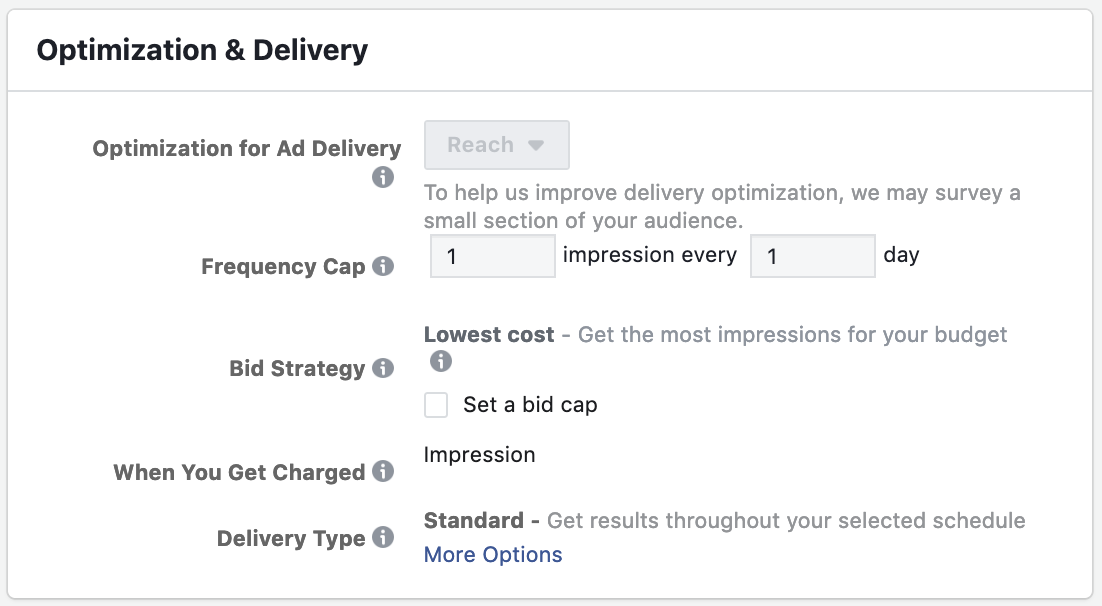
But if volume is low or you are determined to reach a high percentage of people within the campaign, you might optimize for Reach using the Reach objective.

That’s typically my preference, capping frequency at once per day.

My Evergreen Campaign: Placements

Of course, what you do here coincides with your choice for optimization. If you optimize for an action like purchases, your options for placements are wide open. Do what works for you.

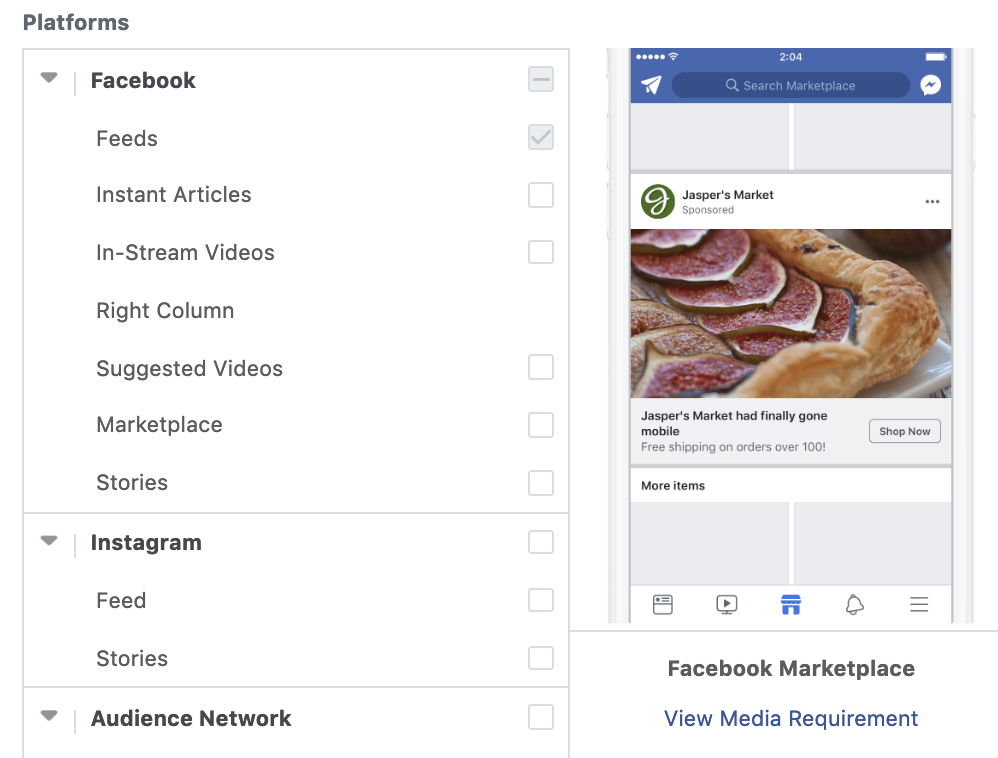
But, if you optimize for Reach and use a frequency cap like I do, limiting placements would be a good idea. Why? If you cap your frequency, you don’t want to waste an impression on a less effective placement (like the right-hand column or Audience Network).

I focus on the feeds only for the purpose of this campaign.

Training: Create Your Own Evergreen Campaign

If you want to learn more about how you can create your own evergreen Facebook campaign, sign up for my training! It occurs this Thursday, February 28. While the training is live, you will also get access to the replays.

If you miss my training and still want access to the replay, join PHC – Elite, my exclusive membership. PHC – Elite members get access to ALL of my training replays (as well as live training, weekly webinars, a private Facebook group, and more).

Your Turn

This is how my evergreen Facebook campaign works. Have you ever done anything like this before? How does yours work?

Let me know in the comments below!

The post How My Evergreen Facebook Campaign Works appeared first on Jon Loomer Digital.

Tuesday, February 19, 2019

How to Implement AMP (If You Really Must): A Quick-Start Guide to Accelerated Mobile Pages

How to Implement AMP (If You Really Must): A Quick-Start Guide to Accelerated Mobile Pages was originally published on BruceClay.com, home of expert search engine optimization tips.

lightning fast

Both searchers and search engines want webpages to be lightning fast. So it’s no surprise that page speed is a ranking factor in Google’s search algorithm.

Multiple studies have shown that page load time also heavily impacts a site’s bottom line: conversion and revenue.

Using Accelerated Mobile Pages (AMP) is one way to speed up your webpages for people using mobile devices.

AMP can present additional benefits: appearing in the AMP carousel in Google search, and offering a better experience to searchers.

AMP search results in Google

Google marks AMP results with a lightning bolt. Some SERPs include an AMP carousel that a user can swipe through.

Is AMP Right for Your Site?

Originally, the AMP solution was intended for media sites. Google wanted to help news stories come up almost instantly from the search results.

Over time, AMP has spread to other types of sites — particularly advertisers, ad-technology platforms and ecommerce sites as well as publishers.

Who is AMP for? diagram from AMPproject.com

Google recommends AMP primarily for these types of sites. (image credit: AMPproject.com)

Today, many websites can benefit from implementing AMP. Retailers and many others use AMP to serve landing pages fast. And ads in this format have a better chance of being seen.

If you’re looking for a way to make your webpages faster, AMP may be right for you.

You don’t need AMP at all for webpages that are responsive and fast enough already. Google’s Gary Illyes has said this publicly.

What are alternatives to implementing AMP?

  • Content Delivery Network. CDNs work by bringing the heaviest resource files on a site closer to the end user. Less distance to travel means faster delivery, so your pages display more quickly on a mobile device.
  • Fully implemented HTTP/2. The HTTP/2 protocol speeds up data transport on the web. So if your market has 4G or 5G internet speeds and your website is HTTP/2 enabled, then you probably don’t need AMP at all.
  • Progressive Web Apps technology. PWAs can make your website behave like a native mobile app. We have written about these before (see What Is a Progressive Web App).

Here’s a story to illustrate that HTTP/2 statement.

One of our consulting clients, a U.S. company, converted several thousand of its webpages to AMP. Four staff members worked for five weeks to complete the project.

The result? Their AMP pages displayed slightly faster to mobile searchers. But the website’s rankings and traffic were unaffected. In hindsight, their time and effort would have been better spent creating new content.

The AMP solution makes the most sense in countries/regions with slow network speeds. For example, our Bruce Clay India office has helped implement AMP for some clients there with good results.

If you believe AMP is right for you and you’re ready to start, I’ll outline the basic first steps.

How to Implement Accelerated Mobile Pages

To implement Accelerated Mobile Pages for your website and track results, there are three basic steps:

  1. Create the AMP page template.
  2. Roll out the AMP pages.
  3. Track with analytics.

We’ll look at each step in detail below, and I’ll also link to AMP documentation for more info.

Once you have decided which parts of your site should be AMP’d, here are the basic steps to creating, publishing and tracking AMP pages.

1. Create the AMP Page Template

The first step in implementing AMP is creating a webpage template.

AMP integrates with many different publishing platforms. You can view the list in AMP’s Quickstart guide and choose your content management system to get more details.

You can build AMP templates from scratch. Or you can convert existing HTML pages into AMP format. The documentation gives information on all the options.

Pointers for creating an AMP template:

  • When creating a page template for AMP, ensure that it meets AMP specs. You can find guidance on HTML format and more at the AMP specifications page.
  • When styling the page, you won’t have JavaScript at your disposal. Include as many custom <amp&ast;&rt; tags as you need to make the layout look good. That includes using responsive images, video and audio (see AMP replacements for details).
  • Keep it simple. After all, the point of AMP is to have a clean, stripped-down webpage.
  • Include some sort of navigation to your domain on each page. You can link from a logo, image or text. Because AMP pages are served from a Google cache, giving searchers a link is essential to try and keep them on your website.
  • If you need to keep ads on your webpages, you must migrate them. Use the amp-ad component. If you cannot use <amp-ad&rt;, then do not include ads in your AMP templates. (You can read more about advertisements on AMP here.)
  • Finally, validate the AMP page. Just one error or warning will keep the page out of the AMP cache. So validation is a crucial step. Check out this page for common validation errors.


2. Roll Out the AMP Pages

I like the idea of testing one or two types of pages from your website on AMP first. Ideally, include some pages that rank so that you can see if Google is serving the AMP version in mobile search results.

Depending on your site’s crawl rate, it could take a couple of days before Google finds, checks and indexes the AMP version of the page.

Let the rollout run for at least one month (longer if you can do it). As long as your pages are getting traffic, you’ll build enough data to ensure that rolling out AMP sitewide is worth it.

3. Track with Analytics

You’ll want to track the performance of your AMP pages. Since AMP analytics will be different from normal Google Analytics, read this guide to understand how it works.

You can track pages via in-house or third-party analytics. Many analytics vendors have built-in configurations for amp-analytics.

You can use amp-pixel for simple tracking and amp-analytics for everything else.

Technical recommendations as you’re setting up tracking:

  • Make sure to use the canonical URL and other variables to define what should be recorded. This is essential to understanding any traffic increases or decreases due to AMP.
  • Use the extraUrlParams attribute in amp‐analytics to add a query string parameter to the canonical URL like “type=amp” or something similar. This will make it easy to differentiate AMP pages from normal webpages in analytics, or to create a custom segment if you need to. This way, you can compare total traffic on pages before and after the AMP launch.

Side Note: How Accelerated Mobile Pages Work

If you’re wondering how AMP pages can possibly appear to load instantly, it’s because they are optimized differently than a regular webpage.

Below I’ve summarized optimizations that AMP does to reduce the amount of work a browser must do to display a page. (See the full list on the AMP Project site.)

Here’s what the AMP process can do:

  • Execute asynchronous JavaScript only – It doesn’t wait for big files to load.
  • Size resources (such as images, ads and iframes) statically – The browser knows exactly how the page will be laid out from the start.
  • Don’t let extensions block rendering – The page doesn’t have to wait even if there are extensions coming.
  • Keep third-party JavaScript out of the critical path – Things like ads are restricted to sandboxed iframes.
  • Allow inline CSS only – Bloated CSS files don’t delay the page.
  • No HTTP requests until fonts start downloading – Keeps fonts efficient.
  • Minimize style recalculations – All DOM reads happen up front to lay out the page.
  • Only run GPU-accelerated animations – The graphics processing unit handles visual animations (transform and opacity), reducing strain on the CPU.
  • Prioritize resource loading – The most important resources (above the fold) get downloaded first.
  • Load pages via prerendered content – Above-the-fold content may be available even before a user selects it, so it appears instantly on click.

Concluding Thoughts

AMP is one way that you can speed up your webpages and offer a better experience to mobile users.

If you’re ready to amp up your webpages, follow the basic steps in this article and the AMP documentation to get started. You might even be able to attend one of Google’s AMP Roadshow workshops (see worldwide schedule here).

But my advice for most sites is: reconsider.

Unless this is critical to your business, please do not implement AMP.

The time you invest converting your webpages to a different format could be better spent creating good content that will serve all of your users.

Now I want to know if you’ve implemented AMP and what tips you have for our readers. Let me know in the comments below.

Monday, February 18, 2019

Change: Pages Can Join Facebook Groups

Did you miss it? In a change that could have a signficant impact, Pages can now join Facebook groups. If you are a group moderator, you should think about whether you want this to be the new normal.

Let’s take a closer look at the announcement, what it means for your Facebook groups, and what you can do about it.

The Announcement

On February 7, Facebook wrote an announcement about changes coming to messaging and groups for businesses. The big change is this one for groups:

…in the coming weeks, Pages will be able to participate in Facebook Groups and join community discussions in a way that is representative of their business or organization.

Note that Pages have been able to create and link groups for a while now. As a group creator, the admin has the option of interacting in the group as a person or as the Page. But until now, other Pages couldn’t join the group.

Facebook provides the following use case from Claire Lee of Venue Queen Ltd. to provide support for this update:

By joining group discussions using my Page identity, I’ve been able raise [sic] the profile of my business. In fact, since switching over from my personal profile to my business Page in the groups I network with, I have seen members from these groups follow me or send messages to my Page Inbox. It’s great because these interactions can eventually lead them to consider me for future opportunities.

Sounds good for the brand. But…

Do You Want Pages in Your Group?

The example above provides evidence for why I do not want Pages in my groups. The argument for interacting in a group as a page is entirely self-promotional.

Now, there may be times when this makes sense. Maybe the entire purpose of your group is focused on promoting and supporting local businesses. But the opportunity for abuse is huge.

Groups are most effective for person-to-person discussion. That’s what makes them interesting and different in the first place. People don’t hide beneath brands and logos. There’s more accountability that way.

I have private communities built around Facebook groups. The entire purpose is to help one another, and we have strict rules that these communities are not places for self-promotion.

I always think about ways that bad actors can abuse a new feature. I fully expect pages — eager to improve their following and organic reach — to begin joining as many groups as they can as a way to promote their businesses.

More spam is coming. More low-quality group content is coming. It’s easy to predict.

What You Can Do About It

As it currently stands, an influx of pages and low-quality content in groups is inevitable because the admission of pages in groups is a default. However, groups do have the ability to turn this off.

First, go to your Group Settings.

Facebook Group Settings

Down the page, you should see a section for “Membership Requests from Pages.”

Facebook Group Membership Requests

In the example above, the default is set to “Allow Pages to request to join as group members.” I don’t want that! Instead, you can simply select the option to disallow new requests from Pages and save the setting. If you’ve already let some Pages in (if you use automatic approval, for example), you may need to go in one-by-one and handle that.

As I type this, I have the “Membership Requests from Pages” section in the Group Settings of two of my three Power Hitters Club private Facebook groups. If you don’t yet have it, I assume that Pages can’t yet join your group.

Why is Facebook Doing This?

I have a hard time understanding this move. In the face of misinformation, spam, inauthentic behavior, and fake accounts, Facebook should be focused on quality. The user experience should always come first, even at the expense of business.

That’s not what appears to be happening here. The thought process behind allowing Pages into groups is focused on improving results for businesses. This will be at the expense of inauthentic, impersonal, and spammy behavior. We, as users and group admins, did not need more of that.

Business owners may see this as a win, but it’s a short-sighted win. While it will be a loophole to get your business seen at a higher rate, many will abuse this. As a result, the quality of posts within groups and the usefulness of groups generally will decrease.

Unless, of course, Facebook does something about it. One step is simple: Turn this off by default.

Your Turn

What do you think about this update? Will you allow Pages into your groups?

Let me know in the comments below!

The post Change: Pages Can Join Facebook Groups appeared first on Jon Loomer Digital.

Sunday, February 10, 2019

The Difference Between Facebook Clicks

There are several variations of “clicks” found within your Facebook ad reports. Knowing — and not knowing — what they mean could vastly impact how you view results. Do you know the difference between Facebook clicks?

After reading this post, you will have a clear understanding of the meaning of the following:

  • Clicks (All)
  • Link Clicks
  • Outbound Clicks
  • Landing Page Views
  • CPC
  • CTR
  • Unique Clicks (all types)

Ready? Let’s roll…

Where to Find This Info

Facebook has improved significantly in this area. You may not even realize how easy it is to find this info.

If you’re ever uncertain about what a Facebook ads metric means, simply hover over the header row in your ad report.

As you can see, the hover definition is pretty good. But there also tends to be a “See More” link that provides even more info. Click that.

Now you’ll see a really nice pop-over window that includes info like the following:

  • Brief definition
  • Exaplanation of how the metric is used
  • Explanation of how the metric is calculated
  • List (with links) of related metrics
  • Links to further related reading

That’s thorough!

I’ll pull the definitions from this information, but I’ll abbreviate and clarify the best I can as well.

Now let’s take a closer look at these similar “click” metrics…

Clicks (All)

Quite simply, this measures the number of clicks on your ads. Any click. Easy.

Clicks to any of the following destinations on a Facebook post or ad would be considered a Click (All)…

  • Link clicks (includes on Facebook and outbound)
  • Clicks to business Page profile or profile picture
  • Post reactions (likes, loves, etc.)
  • Comments or shares
  • Clicks to expand media (photos, videos) to full screen
  • Clicks to take actions identified as your campaign objective (such as liking your Page for a Page engagement campaign)

It’s everything. These clicks add up in a hurry.

This is a good way to measure total engagement on your ads. However, it’s not where you should be looking when wondering how many people clicked through to your website.

Link Clicks

Facebook defines Link Clicks as “the number of clicks on links within the ad that led to destinations or experiences, on or off Facebook.” So, while Link Clicks are more focused than the Clicks (All) metric, they still include clicks on any links, whether they take people on or off of Facebook.

Clicks to any of the following destinations would be considered a Link Click…

  • Websites
  • App stores or app deep links
  • Click to call
  • Click to message
  • Maps/directions
  • Facebook Canvas
  • Facebook lead forms
  • Facebook Marketplace
  • Playable experiences
  • Videos that launch the Watch & Browse experience
  • Videos hosted by another website (like YouTube or Vimeo)

The Link Clicks metric does a better job than Clicks (All) of isolating higher quality clicks that are related to your objective. However, remember that this still includes clicks to destinations on Facebook as well.

CPC (Cost Per Link Click)

Now that you know how a Link Click is defined, there’s no reason to go much further here. Instead, I wanted to reinforce this.

When you track CPC as a key performance indicator, do you realize what clicks are included? Are you okay with the fact that this includes many low-quality clicks that never result in the loading of an external web page?

Advertisers focusing on this metric when measuring the success of an ad sending people to a landing page are making a mistake. And, more than likely, they are creating a very large gap between CPC and Cost Per Conversion.

Outbound Clicks

Not surprisingly, an Outbound Click would be reported any time you click a link that takes you away from Facebook.

Clicks to any of the following destinations would be considered an outbound click…

  • Websites
  • Your app in an app store
  • App deep links

This should be your focus when reporting clicks to your landing page, right? Not necessarily.

Here’s why…

Landing Page Views

The newest of the click metrics, Landing Page Views measures the number of times a person clicked on an ad link and then successfully loaded the destination web page or Instant Experience. The primary requirement of Landing Page Views is that you must have the Facebook pixel installed.

While this is similar to Outbound Clicks, there’s one very important difference: Page load. Outbound Clicks don’t require the click to result in a full load of the page you’re going to, whereas Landing Page Views do.

This may seem like a minor detail, but it’s an important one. Someone may click on an outbound link from your Facebook post, but they may immediately abandon the loading website. If the site doesn’t load long enough for the Facebook pixel to fire, Facebook doesn’t know that the page was loaded.

Why may this happen? Maybe the person clicking has a poor internet connection. Or they click frequently and accidentally.

This matters. It’s about quality. A click on an outbound link lacks value if it doesn’t result in a page load. Landing Page Views provide some confirmation to the value of that click.

CTR

There are two primary versions of CTR when it comes to measuring rate of engagement with a Facebook ad: Outbound and Link Click.

Once again, we’ve covered both already. Just know that Link Click-Through Rate is going to include the click rate on all links while Outbound CTR will include clicks only on Outbound links.

Link Click-Through Rate may provide a better measure of engagement while Outbound CTR is a clearer measure of rate clicks related to an outbound landing page you are promoting.

Unique Clicks

Each of the clicks discussed above also has a “Unique” variation…

  • Unique Link Clicks
  • Unique Outbound Clicks
  • Unique CTR
  • Unique Outbound CTR
  • Unique Clicks (All)
  • Cost Per Unique [Link Click, Outbound Click, or Click (all)]

People often ask why Unique Link Clicks will be less than Link Clicks. Understand that “Unique” is measuring the number of people who performed an action.

For example, you may have 38 Link Clicks and 33 Unique Link Clicks. This is because there were 33 unique people who created those 38 link clicks. In other words, some of those clicks were performed multiple times by the same person or people.

In Summary

Let’s recap in order of highest volume down to least.

Clicks (All) includes all of the clicks we discussed in this post, whether on links or not.

Link Clicks includes clicks on any link, whether directing people on or off of Facebook.

Outbound Clicks are clicks that direct people away from Facebook.

Landing Page Views are recorded only after a click results in the load of a web page and Facebook pixel.

Unique [Clicks (All), Link Clicks, Outbound Clicks, Landing Page Views] focuses on the number of unique people who performed clicks.

All of these metrics have a purpose. The Clicks (All) metric is good for measuring total engagement on a post or ad while Landing Page Views (and even more precisely, Unique Landing Page Views) is best for measuring quality clicks to an external website or landing page.

Compare them yourself. Go ahead and customize columns in your ad reports…

Then find all of the “click” metrics discussed in this post. How do they compare? What gaps are there between them? How might you explain the difference?

Your Turn

Which click metrics do you rely on when measuring results?

Let me know in the comments below!

The post The Difference Between Facebook Clicks appeared first on Jon Loomer Digital.

Thursday, February 7, 2019

How to Target Referral Traffic with Facebook Ads

Facebook advertisers have a deep toolbox available to help reach their ideal audience. One underutilized and underappreciated group they can target is their referral traffic.

How much of your traffic comes from Google? From Instagram? From somewhere else? Are the behaviors, needs, and expectations of these people different from your typical visitor?

Knowing the referral source could allow you to create advertising that caters specifically to their needs.

I have admittedly long taken for granted that not everyone has the ability to create referral Custom Audiences. I’ve been able to do this for years. It’s not because I have access to any Facebook features that others do not. It’s simply due to how my pixel is set up.

My pixel collects parameters along with the standard PageView event. These parameters allow Facebook to collect things like referrer, language, post category, post tags, and more related to the visit.

I have a third party tool that does this for me. While I’ll provide details on that, you don’t necessarily need to use a third party tool to accomplish this. I’ll also provide the manual solution for everyone else to create the custom parameters that will help you generate referral Custom Audiences.

Custom Parameters: Test

You may already be adding parameters to your pixel for certain events, like purchases. In that case, you may include details like product ID and price. But we can do the same for the base PageView event.

In order to create Custom Audiences based on referral source (and other information mentioned above), we need to collect parameters for all visits with our pixel. In a moment, I’ll get to how you set this up. But first, let’s test to see if you have this set up already.

If you use a plugin that injects your pixel code, you may have a setting like I do to control whether your visits as an administrator get tracked.

For this test, you may either want to turn this off or simply log out first. Then, do the following…

1. Install the Facebook Pixel Helper Chrome plugin (it’s free).

2. Go to Google.

3. Type in a search that would bring up results to a blog post or page on your website. Be as specific as possible to make sure you get the results you want.

4. Click the link in the Google Search results that redirect you to that page on your website. You will now be referral traffic from Google.

5. While on that page of your website, click the Pixel Helper icon.

Here’s what my results look like:

Facebook Pixel Helper

I have a section for AdvancedEvents. That’s where my parameter info is. I click to expand and the following details are revealed…

Facebook Pixel Helper

As you can see, the following parameters were collected:

  1. Login Status
  2. Post Tag
  3. Post Category
  4. Language
  5. Post Type
  6. Object Type
  7. User Agent
  8. Object ID
  9. Referrer

Note that there may be others that my pixel collects, but these are the items that were relevant in this case. If I went directly to my home page without a referral from Google (or somewhere else), I wouldn’t see parameters for Post Tag, Post Category, or Referral.

Keep in mind that you may still have Custom Parameters, but organized differently. My plugin organizes them under AdvancedEvents, but it may appear differently for you.

Add Custom Parameters: Pixel Caffeine

The reason I’ve long added these parameters is that I use the free Pixel Caffeine WordPress plugin (not an affiliate link).

[SIDE NOTE: I don’t use affiliate links. I get nothing from Pixel Caffeine for referring them.]

Within my Pixel Caffeine general settings, I have all of the Advanced Tracking checked…

Pixel Caffeine

Add Parameters to PageView Event: Manually

Of course, I realize not everyone uses Pixel Caffeine. In fact, it occurred to me during research for this post that most websites don’t collect parameters on every page view. As a test, I went to several websites (including as a Google referral), and I couldn’t find a single one that tracked this information.

I reached out to an engineer at Pixel Caffeine to find out how someone would do this manually. They were very kind to provide the info.

When you go through the manual pixel setup process, Facebook provides the base pixel code that you need to paste before the closing HEAD tag in the template of your website.

Facebook Pixel Setup

If you paste this base pixel code manually into your template or into either a plugin or Google Tag Manager, you should be able to do this.

We need to inject some additional code after ‘PageView’ and before the closing SCRIPT.

fbq('track', 'PageView', {
referrer: document.referrer
});

As a result, Facebook should then track the referrer for every page view of your website.

Note that I haven’t tested this myself, but I’ve been assured it will work. Please report back.

Create Website Custom Audience

Once you start collecting this information, you should be able to create Website Custom Audiences for these relevant groups. Note that it may take a day or two to show up.

When creating a Website Custom Audience, you should see an option for “From Your Events.” Under it, select the “PageView” event.

Facebook Website Custom Audience

Next, click “Refine by” and then “URL/Parameter.”

Facebook Website Custom Audience

Click the drop-down where “URL” appears. You will now see relevant parameter options that you are tracking. Select “referrer.”

Facebook Website Custom Audience

If you want to create an audience of all referral traffic from Google, I’d select “Contains” and enter in “google.com” below it.

Facebook Website Custom Audience

I’d avoid containing traffic that only includes “google” as it’s possible that this will pull in traffic that includes Google in a URL or UTM parameter. In those cases, it’s not guaranteed to always be referral traffic from Google.

After doing this, of course, it occurred to me that the domain is different depending on the country. You may also want to include other variations of the Google domain, like google.co.uk. Or, include far more variations at once by using google.co.

You may not want to create Custom Audiences of referral traffic from Google. Maybe it’s from Pinterest. It’s the same process. Simply create your audience based on the Pinterest domain instead.

The duration you use for this Website Custom Audience is up to you. Keep in mind the volume of referral traffic that you get when setting this.

Target Referral Traffic

Now that you’ve created the Website Custom Audience of referral traffic, you can target these people!

Within the ad set, enter the name of the audience you just created…

Facebook Website Custom Audience Targeting

You may want to use the Worldwide region, but it’s up to you at this point. Only you know what kind of volume you get from these referrals.

Is there something specific that people search for when they come to your website as a result of a referral? If so, can you then serve them an ad related to this need?

Your Turn

I hope this guide helps you set up the ability to target referral traffic with Facebook ads. Have you done this before? What results do you see?

Let me know in the comments below!

The post How to Target Referral Traffic with Facebook Ads appeared first on Jon Loomer Digital.

Monday, February 4, 2019

Facebook Campaign Budget Optimization Becomes Fixed Default

More than a year ago, Facebook launched Campaign Budget Optimization. Beginning in September, Campaign Budget Optimization will become a fixed default that can’t be turned off.

This is a very big change to the structure of Facebook campaigns. In short, you will no longer be able to set a daily or lifetime budget at the ad set level. Let’s dig into the details of what this means…

The Announcement

Facebook quietly announced this change within a Help Center post titled About Campaign Budget Optimization Migration. The two key takeaways:

  1. Your new and existing campaigns will start to move to Campaign Budget Optimization this September
  2. Once the rollout is complete, you won’t be able to turn off Campaign Budget Optimization for new and existing campaigns

It’s difficult to overstate how much this changes things. While Facebook hasn’t released numbers on how popular this feature is, it’s safe to assume that a very small percentage of advertisers currently use Campaign Budget Optimization. So forcing it will be a major change in habits and process.

Setting Budgets: Now and Before

The current, default method for setting a daily or lifetime budget is at the ad set level.

Facebook Daily Lifetime Budget

With this approach, advertisers set a budget based on a combination of targeting, placement, and bidding. But the primary reason for a new ad set (and budget) was for a different audience.

For example, you may create two different ad sets based on targeting:

  1. Cold Audience (Interests or Lookalikes)
  2. Warm Audience (Website Visitors, Page Likes, or Email List)

In most cases, the warm audience will be much smaller than the cold one. But, the warm audience is also likely to be more effective (cost per desired action) than the cold one. You would consider these things when setting your budget.

Another example of why you’d create multiple ad sets is to separate countries, particularly when you are spending a bit more. I have found, for example, that the bulk of my paying customers come from the United States, Canada, United Kingdom, and Australia. However, it’s much cheaper to get link clicks and free registrations from other countries.

If I’m promoting a blog post or opt-in, it’s usually not a good idea to include all countries in the same ad set. Facebook will optimize to get the most link clicks or opt-ins. As a result, the ad may be shown primarily to countries that don’t ultimately result in a paid conversion.

In other words, I’m willing to pay more to get clicks and email addresses from certain countries because I know they are more likely to ultimately buy. If I leave it up to Facebook, the optimization may leave me spending very little in these primary countries.

This is why creating separate ad sets by country or country group can be a good idea. It forces Facebook to spend in certain places.

We’ll come back to this later…

Campaign Budget Optimization: What Is It?

Launched a little more than a year ago, Campaign Budget Optimization is an option to control your budget at the campaign level.

Facebook Campaign Budget Optimization

By default, this is off.

When activated, you can control the overall daily or lifetime budget for the campaign. Assuming you have multiple ad sets within that campaign, Facebook then optimizes to distribute your budget to those ad sets. Hopefully, this will be more efficient.

This is very similar to what currently happens with ads. You don’t set a budget at the ad level. You can have multiple ads within a single ad set, and Facebook determines how to distribute the budget between them.

If you want to retain some control over the minimum or maximum spend by ad set, the prior version of Campaign Budget Optimization provided some settings for that…

Facebook Campaign Budget Optimization

However, from what I can tell, this is in the process of being removed. There is no mention of minimums and maximums at the ad set level within Campaign Budget Optimization documentation.

How Campaign Budget Optimization Works

Let’s use an example Facebook provides in their documentation. Assume you have three ad sets and spend $10 per ad set.

Without Campaign Budget Optimization, Facebook will attempt to spend $10 per ad set, regardless of performance. With Campaign Budget Optimization, Facebook will react to the performance of each of your ad sets. You may then instead spend more or less per ad set to get the most results.

Here’s a visual representation without and with Campaign Budget Optimization…

Campaign Budget Optimization

Without Campaign Budget Optimization, the campaign resulted in 10 conversions. But, one ad set clearly outperformed the other two. With Campaign Budget Optimization, Facebook optimizes to distribute more of the budget to the high performing ad set, resulting in 15 conversions.

This is all in theory, of course. This is how Facebook says it works. If the feature is valuable, this is how it needs to work.

How is Campaign Budget Optimization Helpful?

Assuming it works and is actually more efficient than the old method (which I realize is a leap), Campaign Budget Optimization does simplify the campaign creation process.

Setting budgets can be a challenge. One of the primary questions I get revolves around how to set budgets based on the size of the audience. And when you split up targeting into multiple ad sets, it becomes a guessing game regarding how you should distribute your budget.

At minimum, this will be good for the less experienced advertiser who struggles with setting budgets.

My Tests with Campaign Budget Optimization

When this feature originally rolled out as an option, I tested it. I had very underwhelming results. At the time, I received worse results with Campaign Budget Optimization than without it. I then quickly abandoned it.

Lately, however, I’ve heard from several members within my Power Hitters Club – Elite community who are using it and getting good results. I’ve since begun to experiment with it again.

My focus with this feature is on two promotions: 1) My free webinar and 2) My Facebook ads quiz. Both utilize the Lead Generation objective.

For each promotion, I created separate campaigns by country or country group. I then have multiple ad sets within each campaign for both cold and warm audiences. Facebook optimizes budget at the campaign level.

I am seeing solid results. Not results that blow me away, but results that I would normally expect. If I’m not getting results that are superior to what I received while setting the budget at the ad set level, I’m at least getting results that are in line with expectations.

This, though not a glowing endorsement, is a sign that the feature is improving since my original tests.

When Won’t Campaign Budget Optimization Work?

This is going to be a controversial change. Advertisers have their routines. We’re accustomed to setting budgets at the ad set level, and most of us think we’re pretty good at it now. Many will see this as forfeiting control.

If you are still angry about ad distribution optimization — and you create separate ad sets for each ad so that you can control the budget spent by ad — you aren’t going to be happy about this.

I can tell you that I’ve long let go of this concern. If I create multiple ads within an ad set, I let Facebook do its thing. I’m done losing sleep over it.

So, I’m going to try and embrace this change, too. But there are going to be frustrating moments. There are going to be times when I won’t agree with Facebook’s optimization.

This happens at the ad level, too. Facebook distributes budget almost entirely to one ad over another. One ad didn’t even get a chance. We want to see what will happen when that ad gets seen!

When it comes to Campaign Budget Optimization, I immediately envision some potential problems. As mentioned earlier, it may be cheaper to get engagement or email addresses from some countries. But, people from these same countries may be less likely to buy. So, ultimately, it may make sense to spend more to get the engagement or email address.

Does Facebook know this? Probably not. If your objective is engagement, traffic, or leads, Facebook is focused on getting you those things at the lowest possible cost. They won’t focus on whether these people ultimately buy from you because it isn’t your primary objective of this campaign.

What Should You Do If CBO Doesn’t Work?

The example above seems to be an immediate problem area. Facebook’s algorithms are unlikely to be smart enough to understand that even though a certain user may result in the cheapest engagement or registration, they may not be a good target long-term. At least, I’m going to assume that Facebook’s algorithms aren’t smart enough to sort this out. I’d be hugely impressed if they are.

Now, I’m going to assume that advertisers will not have the option of setting budget minimums and maximums at the ad set level, as originally allowed with Campaign Budget Optimization. If this is indeed an option, it can solve a lot of problems. Simply utilize minimums and maximums to continue controlling budget at the ad set level.

Otherwise, advertisers will simply need to do the same thing they’ve been doing when confronted with similar ad optimization issues. Force Facebook to spend and distribute the way we want.

To do that, we would need to create separate campaigns per ad set (or group of similar ad sets). If you don’t trust Facebook optimization and you feel the need to do this exclusively, it’s going to create some significant headaches.

I would not recommend taking this approach going in. Give Campaign Budget Optimization a chance. See what happens. Then, where necessary, adjust.

Preparation

If you’re reading this in February, March, April, or May, this change is still a bit in the future. You have time to experiment with this feature and prepare.

However, note that your existing campaigns will migrate to Campaign Budget Optimization. That’s a big deal. That could change how your campaigns are currently running.

In August, this will become an urgent issue. At that point, it will be important to check all active campaigns as the very structure will be changing.

Your Turn

As I type this, about eight months remain until the change goes into effect. There’s time for Facebook to improve Campaign Budget Optimization. There’s also time for us to get better at understanding how to use it efficiently.

What are your thoughts on this upcoming change? Let me know in the comments below!

The post Facebook Campaign Budget Optimization Becomes Fixed Default appeared first on Jon Loomer Digital.

Wednesday, January 30, 2019

How to Improve Google Image Search Ranking

How to Improve Google Image Search Ranking was originally published on BruceClay.com, home of expert search engine optimization tips.

cell phone with image

If you can optimize it, you should. And images are no exception.

The images on your website represent another way to drive organic search traffic. Often overlooked, Google Image SEO can be just as important as optimizing your webpage text.

In fact, you might be surprised at just how much traffic your images are already sending to your site.

TL;DR: Google Images represents another path outside of regular web search for your audience to find your site and discover your content. Google is making significant changes to Google Images that put more emphasis on quality and relevance. To help you drive traffic from image search, we provide a list of ways to optimize images for a website.

How to SEO Images: Table of Contents

First, we’ll take a quick look at the latest news about Google Images:

Then we’ll dive into how to SEO images in 16 steps:

  1. Track Your Image-based Traffic
  2. Create High-Quality, Original Content
  3. Use Relevant Images
  4. Have a Proper File Format
  5. Optimize Your Images
  6. Always Create Alt Text
  7. Make Use of the Image Title
  8. Create an Image Caption
  9. Use a Descriptive File Name
  10. Implement Structured Data if Possible
  11. Consider Image Placement on the Page
  12. Analyze the Content Around the Image
  13. Create Page Metadata
  14. Ensure Fast Load Time
  15. Make Sure Images Are Accessible
  16. Create an Image Sitemap

What’s New with Google Images

Google’s goal over the past year was to make image search more useful to users. We’ve likely all had the experience of finding an image connected to a not-so-great webpage.

Now, images attached to great content can do better in Google Images. So websites have more opportunity to rank images and drive traffic with well-optimized content.

Updates to Google Image Search

Major improvements to Google Images were announced in September 2018. The image-ranking algorithm now weighs these factors more heavily:

  • Authority: The authority of the webpage itself is now a more important signal for ranking an image.
  • Context: The ranking algorithm takes into account the context of the search. Google used the example of an image search for “DIY shelving.” Results should return images within sites related to DIY projects … so the searcher can find other helpful information beyond just a picture.
  • Freshness: Google prioritizes fresher content. So ranking images will likely come from a site (a site in general, but we believe the actual webpage in question) that’s been updated recently. This is probably a minor signal.
  • Position on page: Top-ranked images will likely be central to the webpage they’re part of. (And higher up in placement on the page.) For example, a product page for a particular shoe should rank above a category page for shoes.

Google Images results pages also got a facelift:

  • Captions: Image results now show more context. For example, searchers can read captions including the website and title of the page where the picture is published.
  • Related searches: Google started providing related search terms at the top of the results page. Notice the buttons, which help users narrow their search.

    NOTE: We cannot reproduce this in Google SERPs today, so this may have been a temporary feature.

Related search terms in image results

Related search terms across the top let searchers narrow image results.


Google Hints at More Changes to Come

Google Webmaster Trends Analyst John Mueller indicated this week that images are a “bigger topic” now.

People are running transactional and informational types of searches more frequently through Google Image search. We don’t have details yet, but Mueller’s statements (see below) make it a good bet that more UI changes are coming.


AI-Powered Results in Google Images

One futuristic feature that Google has already rolled out is its AI-powered Google Lens technology.

Users can now identify objects of interest within images as they look through image search results:

Lens’ AI technology analyzes images and detects objects of interest within them. If you select one of these objects, Lens will show you relevant images, many of which link to product pages so you can continue your search or buy the item you’re interested in. Using your finger on a mobile device screen, Lens will also let you “draw” on any part of an image, even if it’s not preselected by Lens, to trigger related results and dive even deeper on what’s in your image.

To show this in action, I searched for [diy outdoor grilling stations] and picked out a beverage center sitting in one of the resulting pictures. This revealed a new set of image results:

Google Lens at work

Google Lens at work: searching within a picture.

For now, the Lens feature works only in U.S. English, and only from image search in mobile browsers, not in the Google app.

But we expect Google Lens to be activated across more search platforms soon. It makes image search extremely flexible, letting users pinpoint what they want using visuals instead of words.

This new AI technology increases the population of search results. It also encourages more image-based searches.

Google increasingly understands the contents of even non-optimized images. So your images potentially have much more competition.

Image SEO becomes even more important. It’s time to optimize your images so that they can stand out.

How to Optimize Images for SEO

With all these changes to Google Images, how do you ensure you can get your share of visibility?

In this sense, Google Images search works much like regular web search. Googlebot needs to be able to crawl, index and understand what your images are about. Only then can they rank.

The latest updates to Google Images tell us that relevance and quality are more important than ever. That means providing the search engine with as much context as possible.

Here are 16 important steps to SEO images …

1. Track Your Image-based Traffic

Want to know how many visitors you get through Google Images search?

You can track organic search traffic from Google Images using the Search Console Performance report.

How to track image search traffic:

  1. Log in to Google Search Console for your website.
  2. Click Performance.
  3. Change the search type at the top to Image. This filters the data so you can keep an eye on your traffic from image search.

Google Search Console Performance Report for images

Alternatively, in Google Analytics you can use the Referral report. Google Images search traffic is broken out from other search traffic. The line with the Source/Medium “google organic / images” is where you’ll find that data.

Take a baseline and watch your search traffic grow as you apply SEO to your images.

2. Create High-Quality, Original Content

Search engines want to reward high-quality pages. This applies to the information on the webpage that your image is hosted on, and to the image itself.

In its image best practices help file, Google discourages “pages where neither the images or the text are original content.”

So whenever possible, take your own photos and make your own graphics.

What if you have to use stock photos? There are a lot of ways to modify stock images to make them unique. You can add filters, crop them, overlay text, and much more.

Also remember that when you do use images from elsewhere, you must honor copyrights, license fees and/or trademark laws.

Google now includes metadata support for crediting images to the proper author and rights holder. This is visible by clicking “Image credits” where available.

3. Use Relevant Images

Choose or create images that are helpful to the overall theme of the page. That might be an infographic, a diagram, an appropriate photograph or something else.

Remember that search engines would rather rank a picture if it’s on a webpage that will satisfy the searcher’s intent with more relevant content.

4. Have a Proper File Format

Use an image file format that search engines can index. The three most common are:

  • PNG, good for screenshots and images with graphics or text. Depending on image complexity, PNGs may create larger files than the other formats. The PNG format uses lossless compression, which means the quality is preserved.
  • JPEG, good for most photographs. JPEGs create smaller files by using lossy compression, which means there will be a loss of image quality every time you save this file format.
  • GIF to create animations. GIFs use lossless compression, which means the quality remains the same.

Another type that’s becoming popular is:

  • SVG. This is a scalable vector format. As opposed to the raster types mentioned above, vector graphics can be extremely small files that don’t lose quality no matter how much they’re enlarged.
    Raster vs. vector images

    Notice how the vector does not pixelate as it’s enlarged. (Image credit: Google)

    SVG isn’t right for photos or complex images, but it works well for simple graphics with geometric shapes, such as a logo.

Now, next-generation image formats exist. These formats have better compression, are higher quality, load faster, and take less cellular data:

  • JPEG 2000
  • JPEG-XR
  • WebP

WebP has been gaining attention lately. It’s possible to convert existing JPEG and PNG files to WebP.

From the Google Developers FAQ page on WebP:

WebP is a method of lossy and lossless compression that can be used on a large variety of photographic, translucent and graphical images found on the web. The degree of lossy compression is adjustable so a user can choose the trade-off between file size and image quality. WebP typically achieves an average of 30% more compression than JPEG and JPEG 2000, without loss of image quality …

5. Optimize Your Images

There’s no single best way to optimize images. For each one, you need to find the optimal balance between minimum file size and maximum quality. Here are must-dos:

  • Resize and crop images to be no larger (in dimensions) than they’ll be displayed. With raster-style images (the most common type on the web), you might need to save several versions at various resolutions to work for different users.
  • Choose the most efficient file format per image (see my last point). It’s OK to mix different types of images on the same webpage.
  • Use compression to reduce file size. When saving a JPEG, for example, slide the quality bar down as far as you can without losing visual quality. With an SVG file, Google suggests you minify it by running it through a tool like svgo.
  • Consider replacing a picture with a different technology altogether. CSS effects can produce shadows, gradients, and more. Web fonts let you show text in beautiful typefaces, which actually improves your page’s usability and crawlability compared to an image.

I suggest you bookmark Google’s image optimization guide for more technical how-tos.

6. Always Create Alt Text

Accessibility for all users is important. That’s why adding alt attributes to images is part of our always up-to-date SEO checklist.

Alt text describes what the image is about to the visually impaired who use screen readers. It also can give search engines valuable information about the image’s contents.

Only when appropriate, use a relevant keyword you’re targeting to describe the image.

Remember that with linked images, search engines treat the alt attribute as the link anchor text. For example, if you have a question mark icon linking users to your help system, include alt=”Help” in your image tag.

7. Make Use of the Image Title

There’s an optional title attribute that you can give to each image. Some tests have shown that Google does index image titles.

8. Create an Image Caption

Add a little extra context by describing the image in a caption. You can also give the image source here, if appropriate.

WordPress Image caption field

In the WordPress editor, adding a caption is simple to do.


9. Use a Descriptive File Name

This is an often-overlooked step. But I have a quick remedy.

When you save your image file, accurately describe the photo in a few words or less. For example, ugly-christmas-sweater is a better file name than IMG01534.

In a webinar with Google’s Gary Illyes at Search Engine Journal, he pointed out that it’s just not feasible for large sites to have accurate file names for all their images (Pinterest, for example).

Illyes says this is more of a nice to have than a requirement for ranking. But, Illyes did explain when the file name can matter:

“I would imagine that it would be something that, all signals considered equal in case of your and your competitor’s images, if you have a better file name, then perhaps you might get ranked better with your image …”


10. Implement Structured Data If Possible

Google Images supports structured data markup for a product, video and recipe.

When you add structured data to your webpage’s HTML, your image results can be richer. Extra bits of information can show along with the image. And that can encourage more clicks and visitors to your site.

Google example result with structured data

Structured data can help Google display things like the price and availability of a product.


11. Consider Image Placement on the Page

Google says in its image best practices page (linked to earlier) that “when it makes sense, consider placing the most important image near the top of the page.”

But in the SEJ webinar, Illyes said that you can put an image “pretty much anywhere on the page” and it can be picked up and shown in Google Images if it’s relevant to the query.

12. Analyze the Content around the Image

Consider the body text around the image. Does it give context to what the reader is looking at?

In the SEJ webinar, Illyes called the content around the image (on the page or in a caption) “critical” to understanding the image.


13. Optimize Page Metadata

Google shows relevant information about the webpage (where the image appears) in Google Images results.

So don’t skip your metadata, including title and meta description. They give the user and search engine more context — just like in the regular search results.

Title and meta description showing in image SERP

Metadata (page title and description) can now show up in image search results.

There’s no guarantee that Google will use your metadata word for word. But they’re definitely part of its information processing. Google’s image best practices says:

Google Images automatically generates a title and snippet to best explain each result and how it relates to the user query. … We use a number of different sources for this information, including descriptive information in the title, and meta tags for each page.

14. Ensure Fast Load Time

Performance is a huge consideration for SEO in general.

Large images can drag down page load time. Here are tips to avoid that:

  • Keep image files as small as possible (see Optimize Your Images above).
  • Make images responsive. Basically, that means they automatically change size to fit the user’s device. You can read more about responsive images here and in the “responsive images” section of the image best practices page.
  • Specify how much space the image is going to take up. Knowing this enables a browser to load the surrounding page content while the image file is being requested. There are a number of ways to do this, including: with a
    <div> container; in the CSS code; or with height and width attributes in the <img> tag.
  • Consider lazy loading, which Google recommends as a way to combat slowness.

15. Make Sure Images Are Discoverable

Make sure that search engines can access the images on your site. When they can’t, the robots.txt file is often to blame.

Google Search Console’s “Inspect URL” feature can help you test this. You can also use Google’s mobile-friendly test tool to discover how your pages, including images, work for mobile.

Also, images have their own URLs that can be indexed. So to preserve existing image rankings, be sure to use a proper 301 redirect if you ever need to change an image URL.

16. Create an Image Sitemap

As an optional step, you can create an image sitemap that lists the image files on your website. This can help Google discover them.

You can create a separate XML sitemap for images. (Learn more about that in our creating a sitemap tutorial.)

In the webinar at SEJ, Gary Illyes said that image sitemaps “help enormously” with the image discovery process.

I recommend including only original images, and not all site images, in your sitemap. Listing images from any external source may be a waste of the search engine’s processing budget. Google will find them on your pages anyhow. Taking crawl time, as if they have changed, is not needed.

If an image is unique to your site and revised or new, then include it in your image sitemap. If it was already crawled and not altered, a recrawl is simply wasting time.

Summary

The changes to Google Images are positive for users and for SEOs. Google has once again elevated the standards for websites to create quality content.

Image SEO will evolve — but many of the basics still hold true. The goal is to create the best experience for users visiting your site.

  • Present original, useful content with high-quality, relevant images.
  • Make a fast website that doesn’t make users wait for pages to load.
  • Optimize your images so that search engines can index them properly.

Apply the techniques in this article to optimize images. You may get a leg up on the competition and more eyeballs on your webpages.

(Learn more about how to optimize multimedia content. And check out our search engine optimization tutorial for more best practices.)

I want to know: Have you had good results ranking in the new Google Images? What techniques have you implemented? Let us know in the comments below.